
Zoom has proven to be a lifesaver in the COVID era. It’s been an essential tool to conduct meetings, hold online classes, attend webinars, or even hold virtual reunions with family and friends. Hosting a zoom session is one of the essential skills you need to be a freelancer today.
Sometimes, though, as we’ve seen in some clips going viral online, having your microphone left turned on can lead to mishaps. Knowing how to mute on zoom can prevent background noise and several embarrassing situations from happening.
Here are seven methods to mute on Zoom:
- Set Zoom settings to mute the microphone automatically.
- Join the Zoom call on mute.
- Use the Zoom toolbar microphone icon to mute the microphone.
- Use keyboard shortcuts to mute the microphone.
- As a host, mute all participants when joining a meeting.
- As a host, mute microphones on entry into your meeting.
- Mute Zoom audio while keeping computer volume on.
This article will serve as a complete guide outlining all the methods you can use to mute on Zoom. Whether you use Zoom on a desktop or a mobile app, you’ll learn easy ways to mute yourself on zoom or the meeting participants when required.
1. Set Zoom Meeting Settings To Mute the Microphone Automatically
You may be a student who’s required to keep their computer audio microphone off until instructed to speak in online classes. Or you may attend meetings that involve a single person speaking or presenting at one time. Regardless of the reason, if you find yourself double-checking to make sure your microphone is on mute during a Zoom call, it’s safer to set it on mute by default.
According to the Zoom Support website, only the relatively newer Zoom software versions will allow you to utilize this setting.
For automatically muting your microphone when joining a meeting, you need the following:
- Zoom desktop client for Windows: 5.0.0 or higher
- Zoom desktop client for macOS: 5.0.0 or higher
- Zoom desktop client for Linux: 5.0.0 or higher
- Zoom mobile application for Android: 5.0.0 or higher
- Zoom mobile application for iOS: 5.0.0 or higher
Let us show you how to choose this setting in the Zoom desktop client and the Zoom mobile application.
Zoom Desktop Client
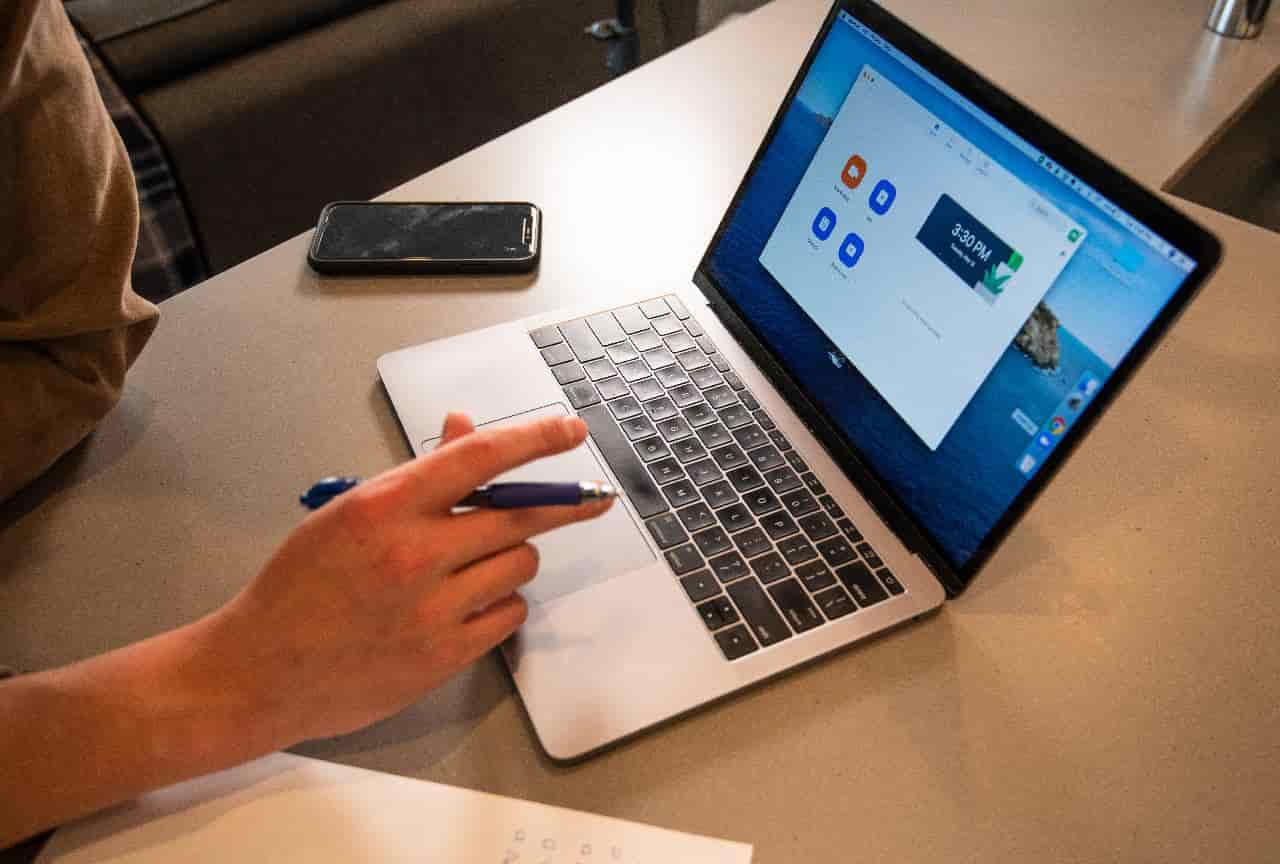
If you’re using Zoom on a desktop, the steps to set your microphone to mute automatically are the same for Windows and macOS software.
Here’s a step-by-step guide (the screenshots are from a Windows interface, but there’s not much difference in the macOS interface):
- Sign in. You can create a Zoom account or sign in quickly with your Facebook account, Gmail ID or Single Sign-on (SSO) provided by your company or employer.
- Go to settings.
- Select Audio.
- Check Mute my microphone when joining a meeting box.
Now, every time you attend a Zoom call, your microphone will be on mute and stay muted unless you manually select the unmute option yourself.
Zoom Mobile Application
When using the Zoom mobile application, use this step-by-step guide to always keep your microphone on mute. (The screenshots are from an Android device, but the iOS mobile app has the same interface).
1. Open the mobile app and sign in. You can create a Zoom account or sign in quickly with your Facebook account, Gmail ID or Single Sign-on (SSO) provided by your company or employer.
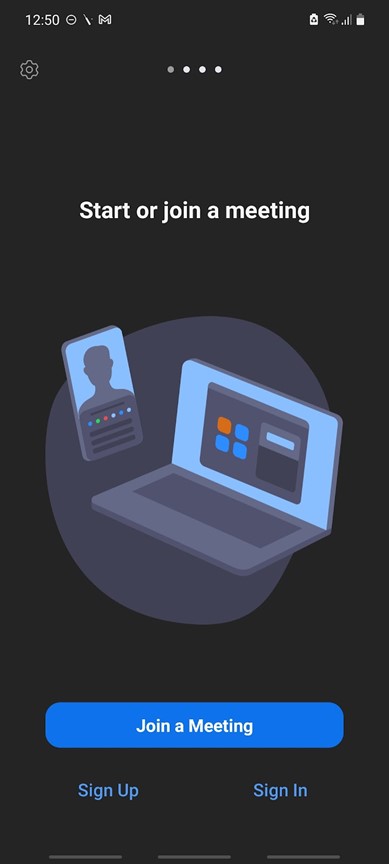
2. Locate and tap ‘Settings’ in the lower right meeting window.

3. Tap on ‘Meeting.’

4. Turn the toggle on next to ‘Mute My Microphone.’ (When it turns green, it’s turned on)

Once these settings are in place, you don’t need to worry about the microphone being accidentally turned on. However, if you don’t want to keep your microphone turned off all the time except for a specific occasion, you can also join a zoom meeting on mute.
2. Join the Zoom Call on Mute
If you’re attending a webinar with instructions for participants not to speak or an online class with too many students, it’s a good idea to start your call by muting yourself to avoid any disturbance. You always have the option to unmute yourself if you’re asked to speak. Whether remote work vs. work from home, online meetups are common and you’ll have to familiarize yourself with these features.
When you start a new meeting, use the method to mute your microphone as mentioned in item 1 of our guide.
This method only works when you’re joining a meeting.

- Request permission and click on ‘join’ to put in the meeting ID and choose your name.
- Select the ‘Don’t Connect To Audio’ option to join the meeting on mute. This option allows you to leave computer audio off, and keep your microphone on mute until you want to speak and then unmute yourself. Turn the toggle on. (When it turns green, it’s turned on)

You can now join the meeting with your microphone on mute and choose to unmute manually when needed.
If you’ve already joined a Zoom call and need to take a break, you can mute yourself during the call, too.
3. Use the Zoom Toolbar Microphone Icon To Mute the Microphone
Unexpected meetings during transit or an interruption from kids when attending meetings at home are situations that demand that you may need to turn off your microphone quickly. Use the method below, with similar steps on desktop and mobile devices, to mute your microphone instantly.
All you need to do is identify the toolbar on Zoom. If the toolbar isn’t visible on a Windows PC or Mac, hover your mouse on the Zoom screen, and that should enable the toolbar to pop up and appear. On a mobile device, tap in the center of the screen.
It should appear at the bottom of the screen for Windows, macOS, and Android devices. You will also see options for screen sharing and to mute yourself on zoom.

For iOS users, the toolbar appears at the top of the screen.

Once you locate the toolbar, click or tap on ‘Mute’ or the microphone icon. Once muted, it will show the microphone icon turned red with a line across it.


If your meetings require you to mute and temporarily unmute yourself constantly, it’s good to learn some keyboard shortcuts to make the process a whole lot quicker.
4. Use Keyboard Shortcuts To Mute the Microphone
If Zoom is an application you frequently use on your desktop, it’s a good idea to familiarize yourself with some keyboard shortcuts. There are shortcuts for almost every command on Zoom, like mute/unmute, start/stop the video, screen sharing, displaying a virtual background, and display/hide chat, etc.
According to the Zoom Support website, your device needs to have the following Zoom software version as a prerequisite to use the keyboard shortcuts.
- Windows: 5.2.0 or higher
- macOS: 5.2.0 or higher
- Linux: 5.2.0 or higher
- iOS: 4.4.5 or higher
Read on as we reveal all the keyboard shortcuts on different devices you can use Zoom on.
Zoom Mobile Application for iOS
If you use a keyboard with your iPad, the shortcut to mute or unmute your audio is Command + Shift + A.

Zoom Desktop Client for Windows and macOS
For the Zoom desktop client on Windows and macOS, you have the option to access your keyboard shortcuts and edit according to your wish.
The steps to access keyboard shortcuts are:
- Sign in to the Zoom desktop client.
- Click on your profile picture.
- Click ‘Settings’.
- Click ‘Keyboard Shortcuts’.
The Zoom application has default keyboard shortcuts that you can use. The default shortcuts differ for Windows and macOS:
- Windows: press the Alt + A keys together to mute/unmute audio

- macOS: press Command(⌘\) + Shift + A to mute/unmute audio
You can also edit the shortcut to anything you find convenient. To edit, follow these steps in the order mentioned:
- Click on the shortcut you’d like to edit.
- Press Backspace to clear the field.
- Type the keyboard shortcut you would like to use. For example, press Shift and M together if you’d like to mute/unmute audio using the Shift + M keys.
- Don’t press Enter to save. Click on the screen around the field to save changes.
Zoom Desktop Client for Linux
If you use the Linux operating software, the steps are similar to those mentioned above for Windows and macOS, with a change in the final step to access your keyboard shortcuts:
- Sign in to the Zoom desktop client.
- Click on your profile picture.
- Click ‘Settings.’
- Click ‘Accessibility.’
You’ll find keyboard shortcuts inaccessible, and the default shortcut to mute/unmute your microphone is Alt + A.
5. As a Host, Mute Participants During a Meeting
If you’re the host or have been enabled as co-host in a meeting, you can mute or unmute a single participant or all participants during a Zoom call. If you are working in any of the highest paying freelance jobs, you will have to meet with clients virtually.
The initial steps to mute one or all participants in a meeting are listed below. (The steps are the same for all devices you use Zoom on, but the items are in slightly different locations)
- Sign in to Zoom (desktop client or mobile application). The screenshots are from an iOS device.

2. Start a meeting as a host or join as a co-host.

3. Click ‘Participants’ or ‘Manage Participants’ icon in the toolbar (see Number 3 on how to locate toolbar)

Once you have reached this step, you can decide to mute each participant individually or all participants simultaneously.
Mute a Single Participant
If you manage a team remotely and hold virtual meetings, you’ll have to become familiar with the menu features. To mute a single participant, click or tap on the participant’s name you want to be muted and click on Mute from the options. Once the participant is mute, the microphone next to their name will turn red with a line across it cancelling background noise.

Mute All Participants
To mute all the participants, click or tap on ‘Mute All’ in the Participants panel.

Uncheck ‘Allow participants to unmute themselves’ that pops up as a dialogue box when selecting the mute all option. This allows you to control the participants’ microphones, and they cannot unmute themselves once you have muted them.

For people using the desktop client, there’s another way to make sure participants don’t unmute themselves. Click on the ‘More option’ at the bottom of the participants bar.
Click on the ‘Allow Participants to Unmute Themselves’, and a tick mark will disappear next to it. It means that now the participants cannot unmute unless you want them to.
Suppose you host meetings often and need more control over the participants’ microphones to avoid disruptions. In that case, you can make changes to keep microphones on mute permanently throughout the meeting before starting a meeting.
6. As a Host, Mute Microphones on Entry Into Your Meeting
If you have admin privileges in a meeting, you can choose to mute all participants as soon as they join your meeting. To do this, you can mute microphones as default in settings, select mute on the entry once the meeting has begun, or simply move a participant disrupting the meeting into the waiting room.
Mute Participants’ Microphone by Default
To access this setting, you have to employ the Zoom web portal. You can access the web portal from any device by typing in zoom.us in any web browser.
To mute participants microphones, follow these steps in the order given below:
- Tap on the three horizontal lines on the side of the website. (This additional step is only required when using the browser on a mobile device)

2. Click on ‘Sign In’ to access your account.

3. Once you’re signed in, click or tap on ‘Settings’ in the drop-down menu.
4. Scroll down until you get to the subheading ‘Schedule Meeting.’

5. Find ‘Mute participants’ upon entry and turn the toggle on.

Now, all the participants that join the meeting will have their microphone automatically muted. This setting will be enabled across all apps you use with the account you used to sign in to the web portal, regardless of your device.
Mute Microphones on Entry
This method is a less permanent solution but can work instantly in a meeting where you do not need the other participants to speak. Once the meeting has begun, follow these steps to mute the audio settings of participants on entry:
- Locate ‘More’ in the toolbar (see Number 3 on how to locate toolbar)

2. Select ‘Meeting Settings’ from the drop-down menu.

3. Turn the toggle on ‘Mute on Entry’.

The participants will have their microphones on mute as soon as they enter the meeting. The host has control if the participants can unmute themselves in a meeting or not. Note that unmuting participants can sometimes create distractions such as background noises which might affect a speaker. You can always revoke consent as part of the features if the distractions are too much. Additionally, members can also send a message to speakers and ask questions that way.
Shift Participant to the Waiting Room
If a participant is causing a lot of disturbance and turning their microphone off may offend them, you can hack your way and send them to the Waiting Room.
To shift a participant to the Waiting Room, follow these steps:
- Sign in to Zoom (desktop client or mobile application).
- Start a meeting as a host or join as a co-host.
- Click ‘Participants’ or ‘Manage Participants’ in the toolbar (see Number 3 on how to locate toolbar).
- Tap or click on the participant name you want to shift.

5. Select ‘Put in Waiting Room’ from the options dropped down.

This feature sends the participant into a virtual waiting room where they can’t participate in the meeting via audio or video. They’ll also not be able to view what is happening in the Zoom meeting until the host or co-host admits them back in the call. If you are trying to get an entry-level remote job, this is a very common process for video interviews.
- If you’d like to get the participants back into the meeting, click on the blue icon saying ‘Admit’ next to their name.

All the above methods talked about muting the microphone while in Zoom meetings, but read on if you’re looking to mute Zoom audio of an ongoing meeting while listening to something else on your device.
7. Mute Zoom Audio While Keeping Computer Volume On
This method is only applicable if you’re using Zoom on Windows. On Windows 10, you’ll find a toolbar at the bottom of the screen. In this toolbar, you’ll find the Volume Mixer option that will allow you to mute the audio for Zoom.
Follow these steps to mute the audio for Zoom while a Zoom call is ongoing and keep the other sounds turned on:
- Right-click on the Sound icon that looks like a loudspeaker in the bottom toolbar.
- Click on ‘Open Volume Mixer’ from the options that appear.
- Locate the bar for Zoom Meeting. You’ll see multiple customizable volume options for the other applications open in your Windows.
- You can drag the bar under Zoom Meeting down to the bottom. Or click on the sound icon below Zoom Meeting to mute the audio.
A word of caution, though, is that in this method, your microphone will still be turned on. You won’t be able to hear the meeting being conducted on Zoom, but if your microphone is turned on, the other participants in the meeting will be able to hear you. Make sure you use the methods described in numbers 1 to 4 to mute your microphone and then turn off the audio to avoid any mishaps.
Best Practices How To Mute On Zoom
Zoom is the go-to application for virtual meetings, online classes, webinars, and family reunions and has proven to be a blessing in the distressing COVID times. However, knowing how to mute on zoom and your way around the application to manage participant sounds is a must. In this article, we discussed methods that will help you do the following:
- Choose default settings to mute your microphone automatically
- Enter a meeting by not connecting to audio
- Use the toolbar or keyboard shortcuts to toggle between mute/unmute instantly
- As the host or co-host, mute one or all participants
- Mute zoom audio while keeping computer’s sound on